If you are currently using forms that you set up in the Account section, they will continue working until you publish the new pages. The “classic” pages will be discontinued in the future. We will give you plenty of time to prepare.
Customize your signup experience
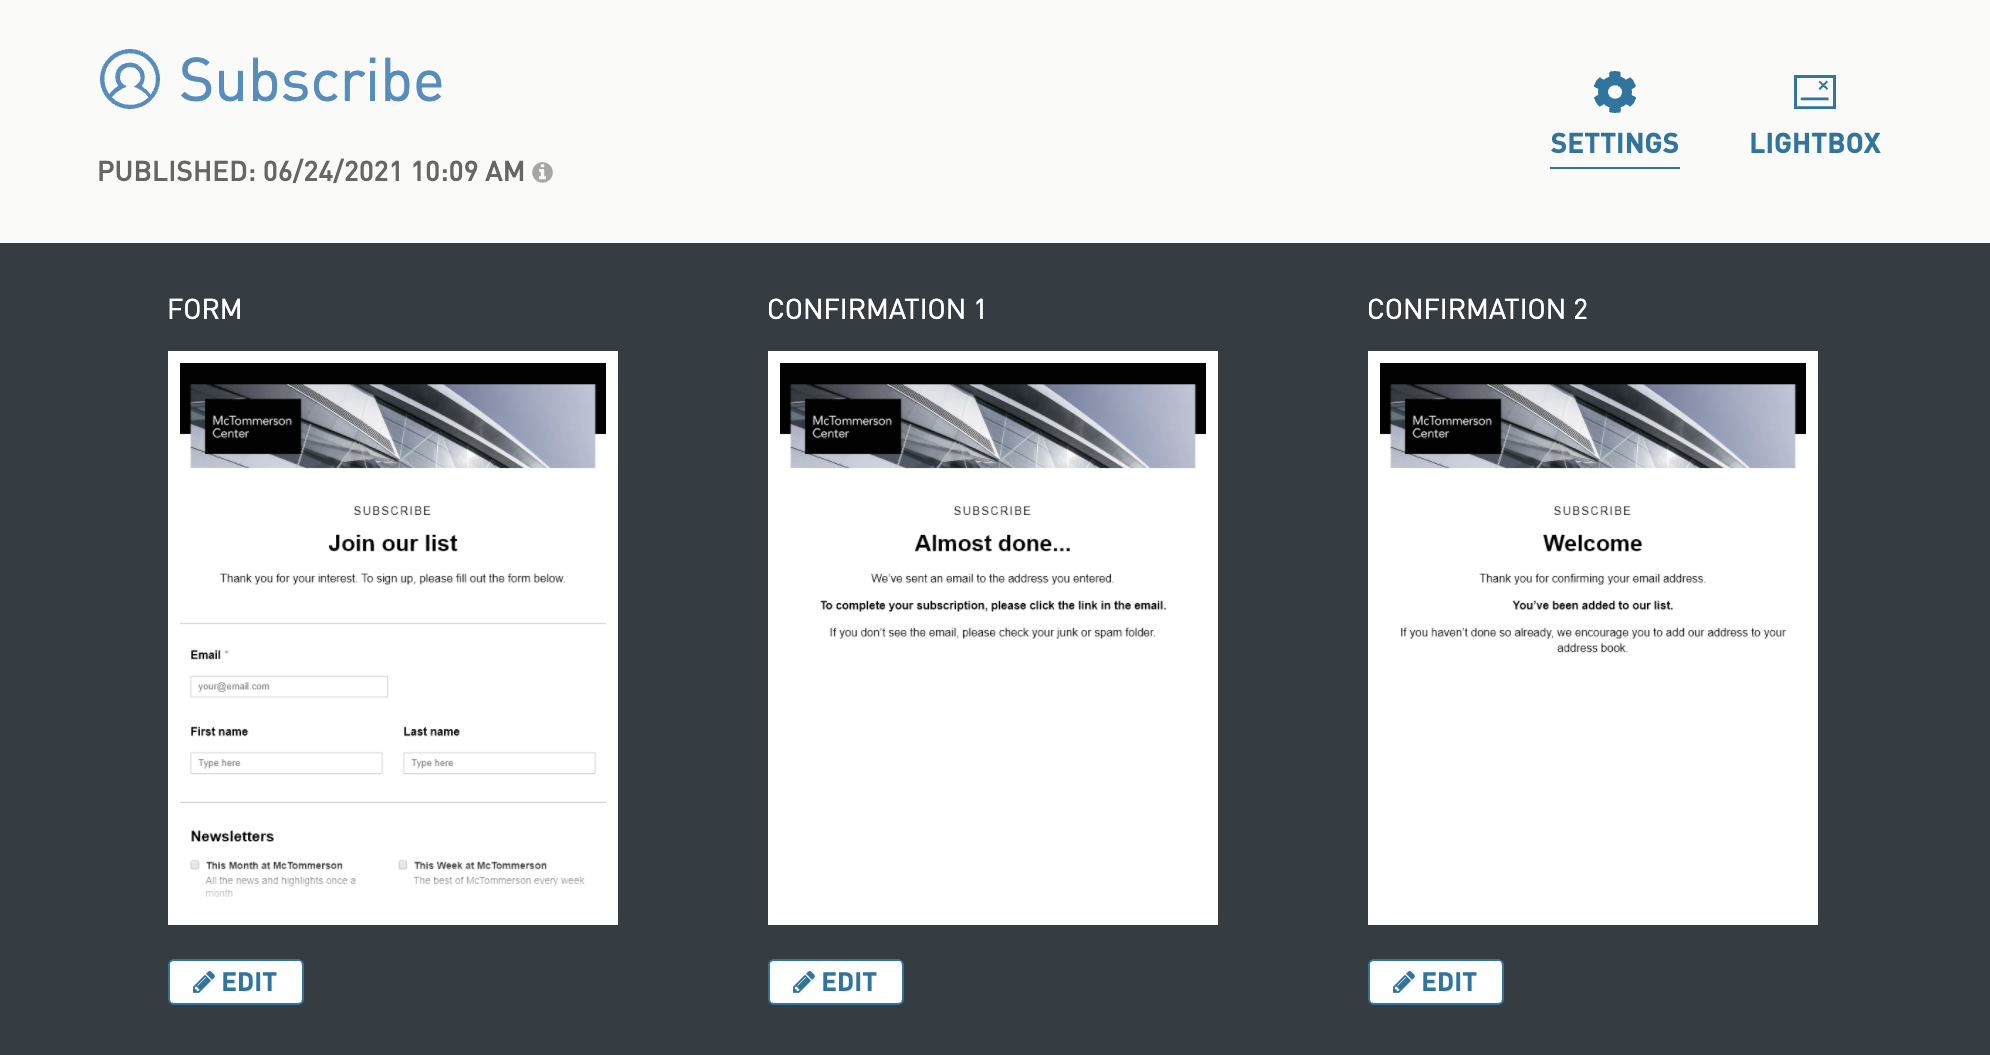
Encourage opt-in with beautiful and effective forms created in Pages, including a separate page for updating preferences. To get started, customize and publish your pages. Then, click the Use as Default button when you’re ready to completely switch over from your Account pages. Once selected, any new emails created from a WordFly starter email will point to the new pages. It will also switch the Add Link UI in the editor to point to your new pages. Update any existing custom starter emails with the new link.
The subscribe page
-
More flexibility with preferences
To collect preferences at signup, drag over a Preferences block. You can even have multiple preference blocks. -
Collect more info about your subscribers
Drag over a Text Field block and map it to one of your existing data fields. You can add as many fields as you need. -
More humans, fewer robots
The subscribe form now includes a required ReCAPTCHA field as an additional layer of protection against signups from bots. -
Embedded signup
Add a single email field to your website that takes subscribers to the full subscribe page where they can provide more details and preferences. -
Pop-up signup
Click the Lightbox tab, customize, and copy the code for your website. For advanced flexibility, use the JavaScript function. With this script, you can decide how and when the lightbox displays, match the button style from your website, or use an image for a button instead.
Customize the subscribe page →
The unsubscribe page
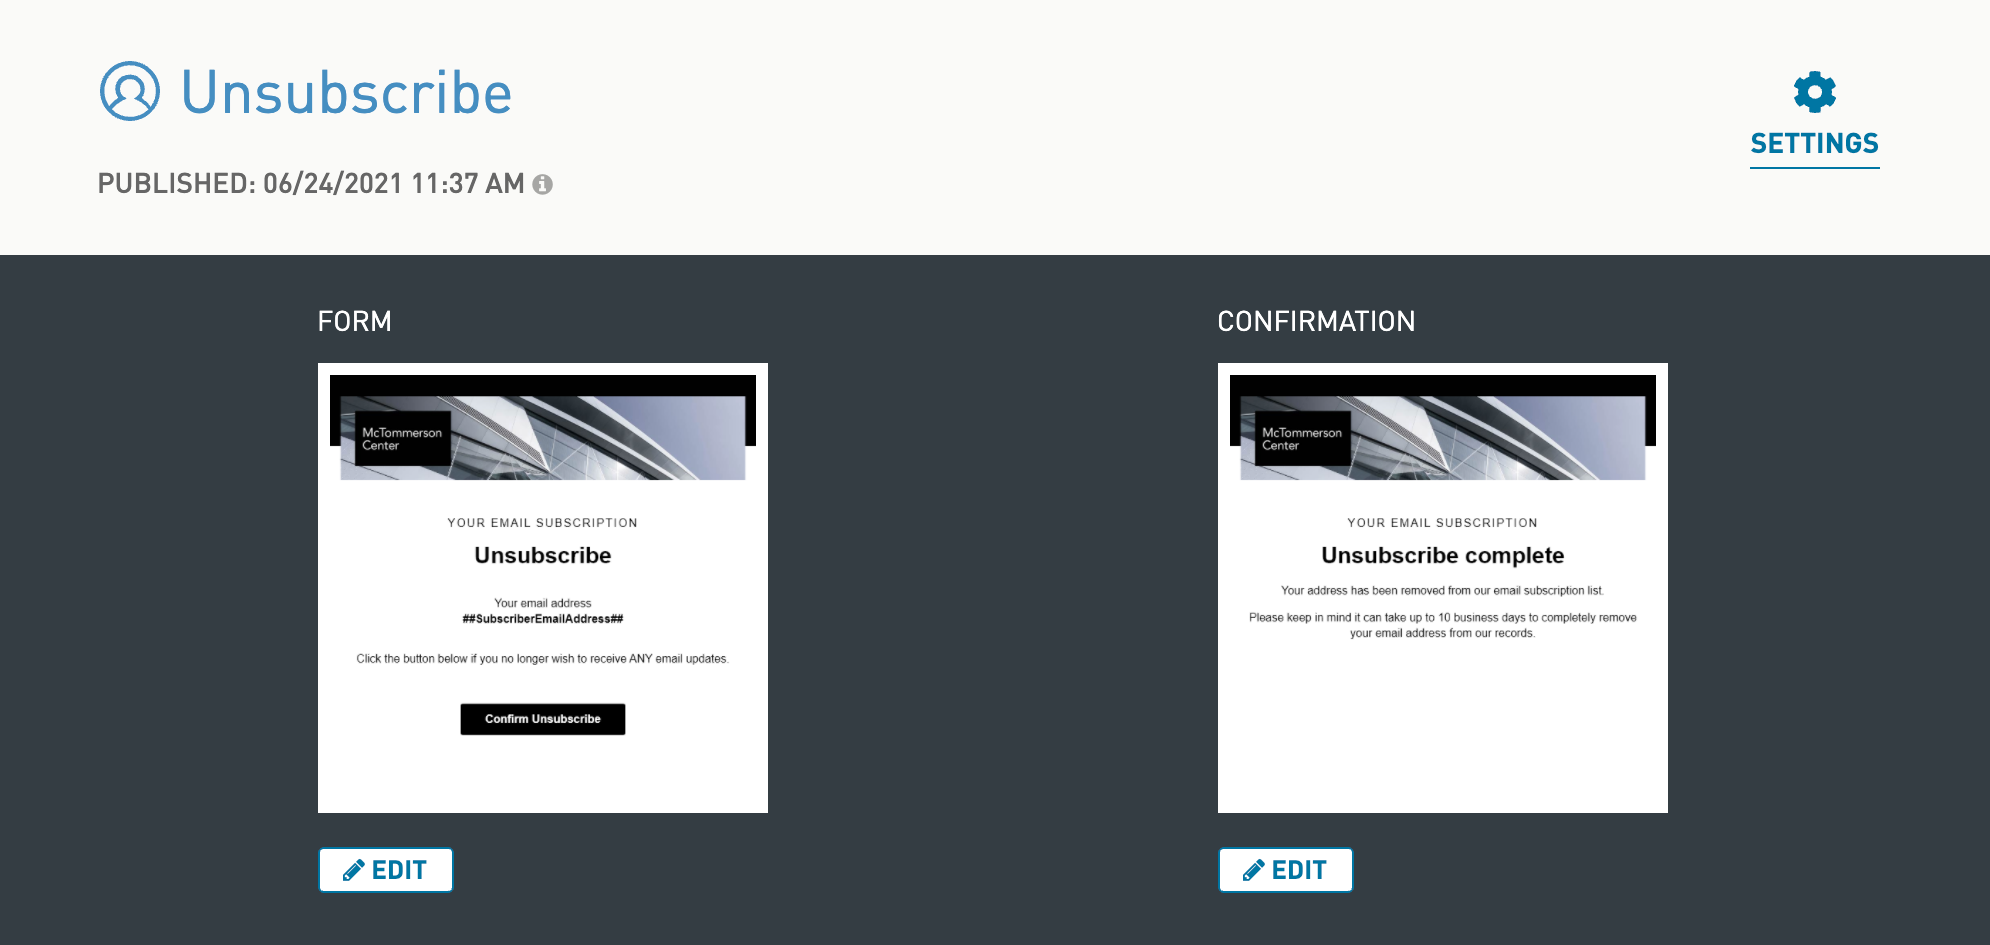
- Our unsubscribe form is now exclusively a two-step process. After subscribers click the Unsubscribe link in an email, they will be taken to a page where they are asked to confirm their unsubscribe. This will prevent accidental unsubscribes.
- The Update Preferences section is no longer part of the unsubscribe page. Preferences now live on a separate page. This allows you to create two separate links in your email footers, i.e., Update Preferences and Unsubscribe.
- To combine preferences and unsubscribing on the same page, add a button to your unsubscribe page that links to your Preferences page, e.g., ”Change your mind? Update preferences”
- The unsubscribe page is published by default.
Customize the unsubscribe page →
The preferences page
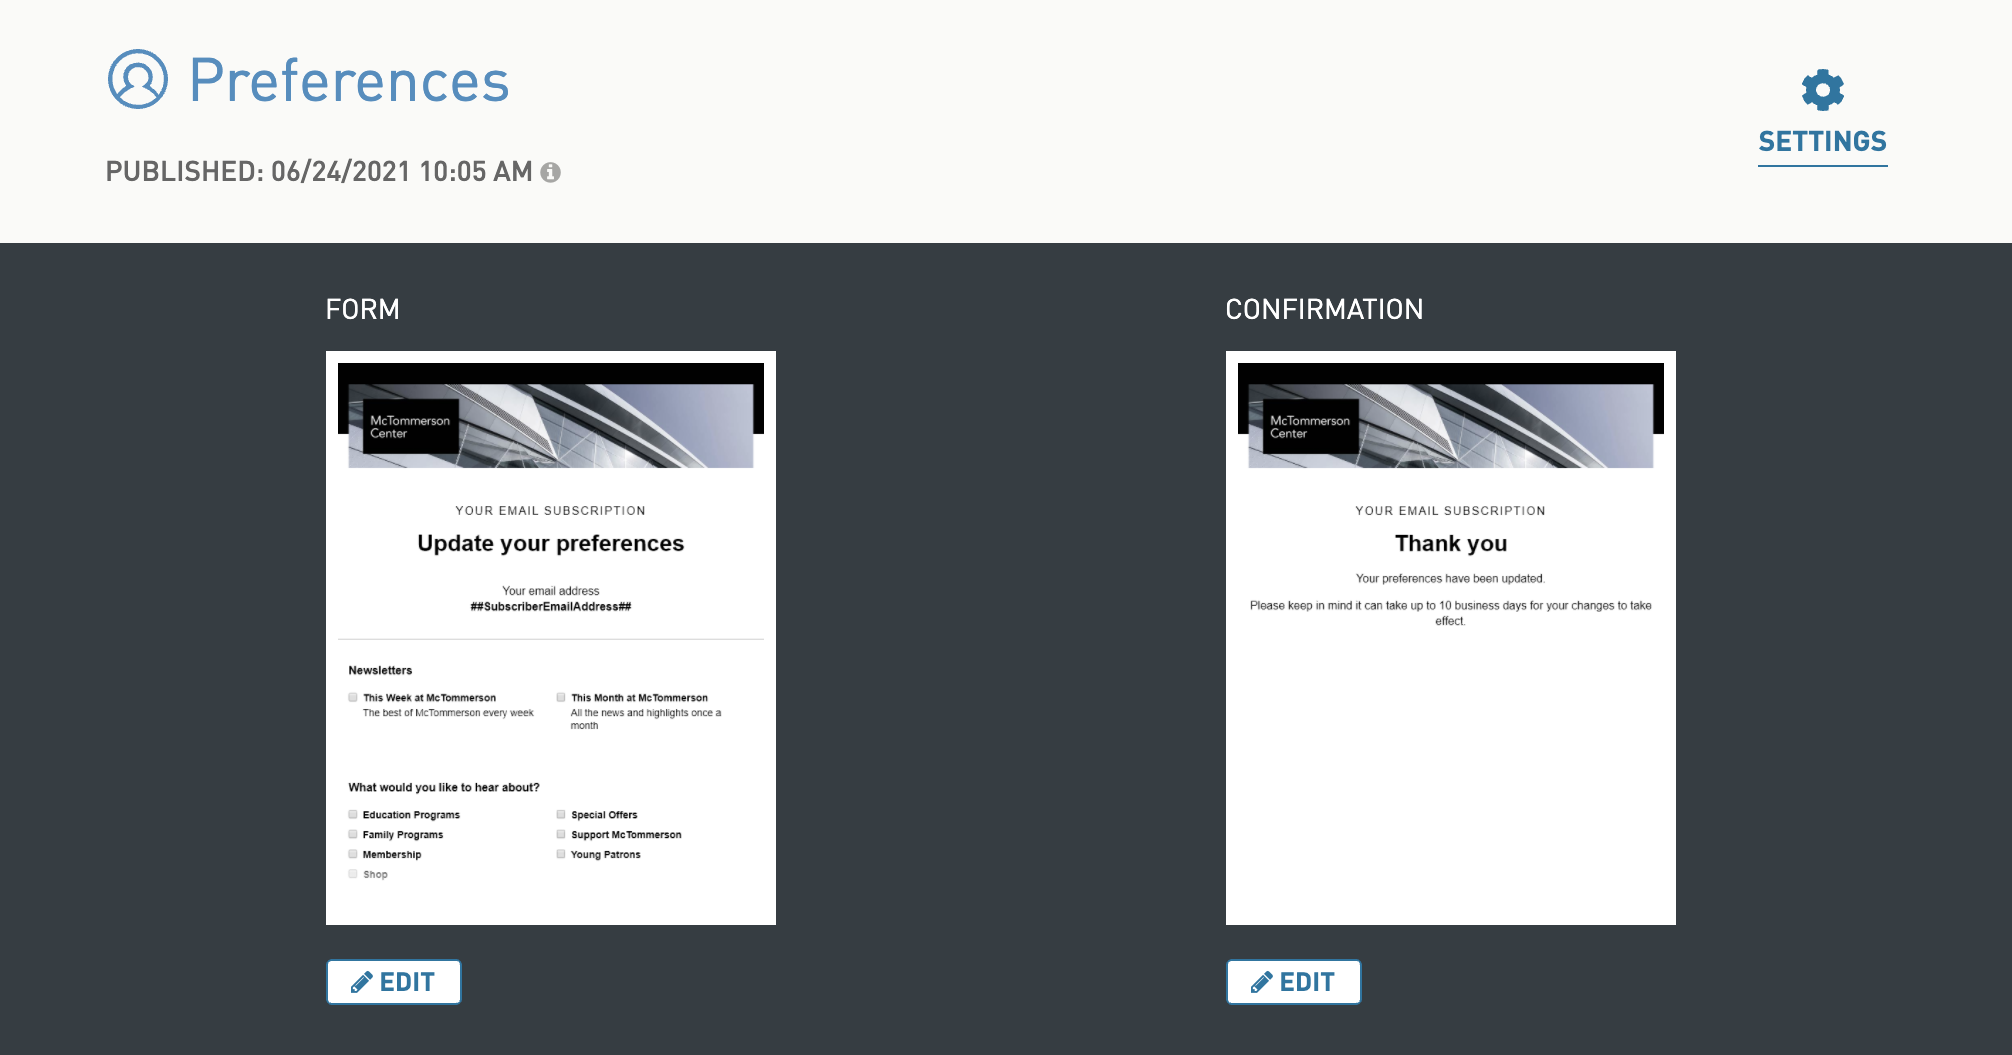
- Preferences can now be managed on a separate page. The Update Preferences section is no longer part of the Unsubscribe page. This allows you to create two separate links in your email footers: Update Preferences and Unsubscribe.
- To combine preferences and unsubscribing on the same page, add a button to your Preferences page that links to your Unsubscribe page, e.g., ”Unsubscribe from everything”
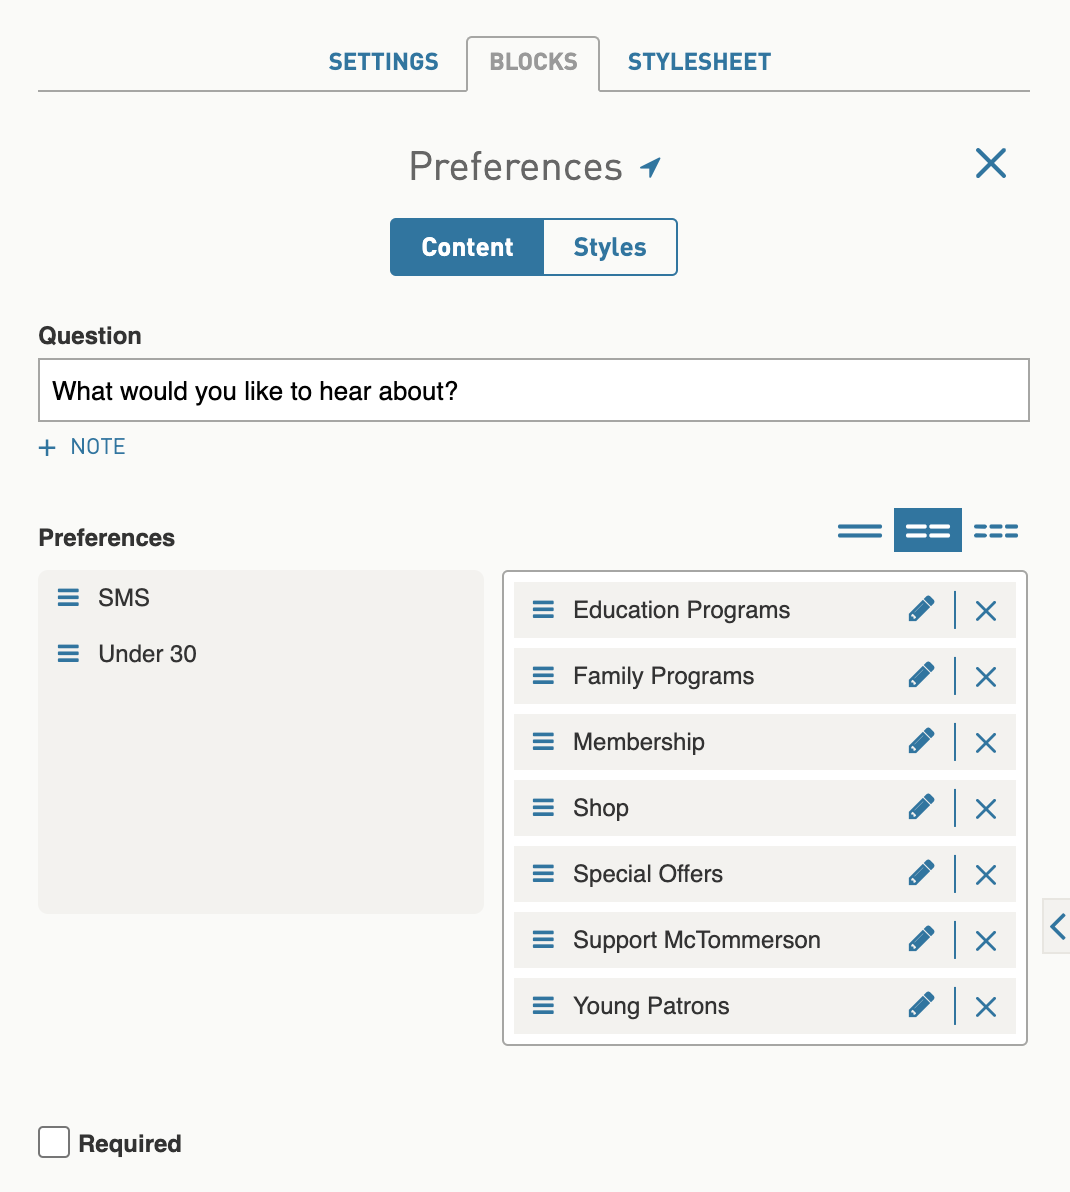
- You can also now have multiple preferences sections on a single page. This allows to group preferences into different blocks, like “What would you like to hear about?” and “How often would you like to hear from us?” Drag over a new Preferences block when you want a new grouping.
- To create preferences for your new forms, go to Subscribers > Preferences. Any preferences you create here can be added to your Preference or Subscribe forms. You can add a description for each preference right here, too, when needed.
Customize the preferences page →
The forward page
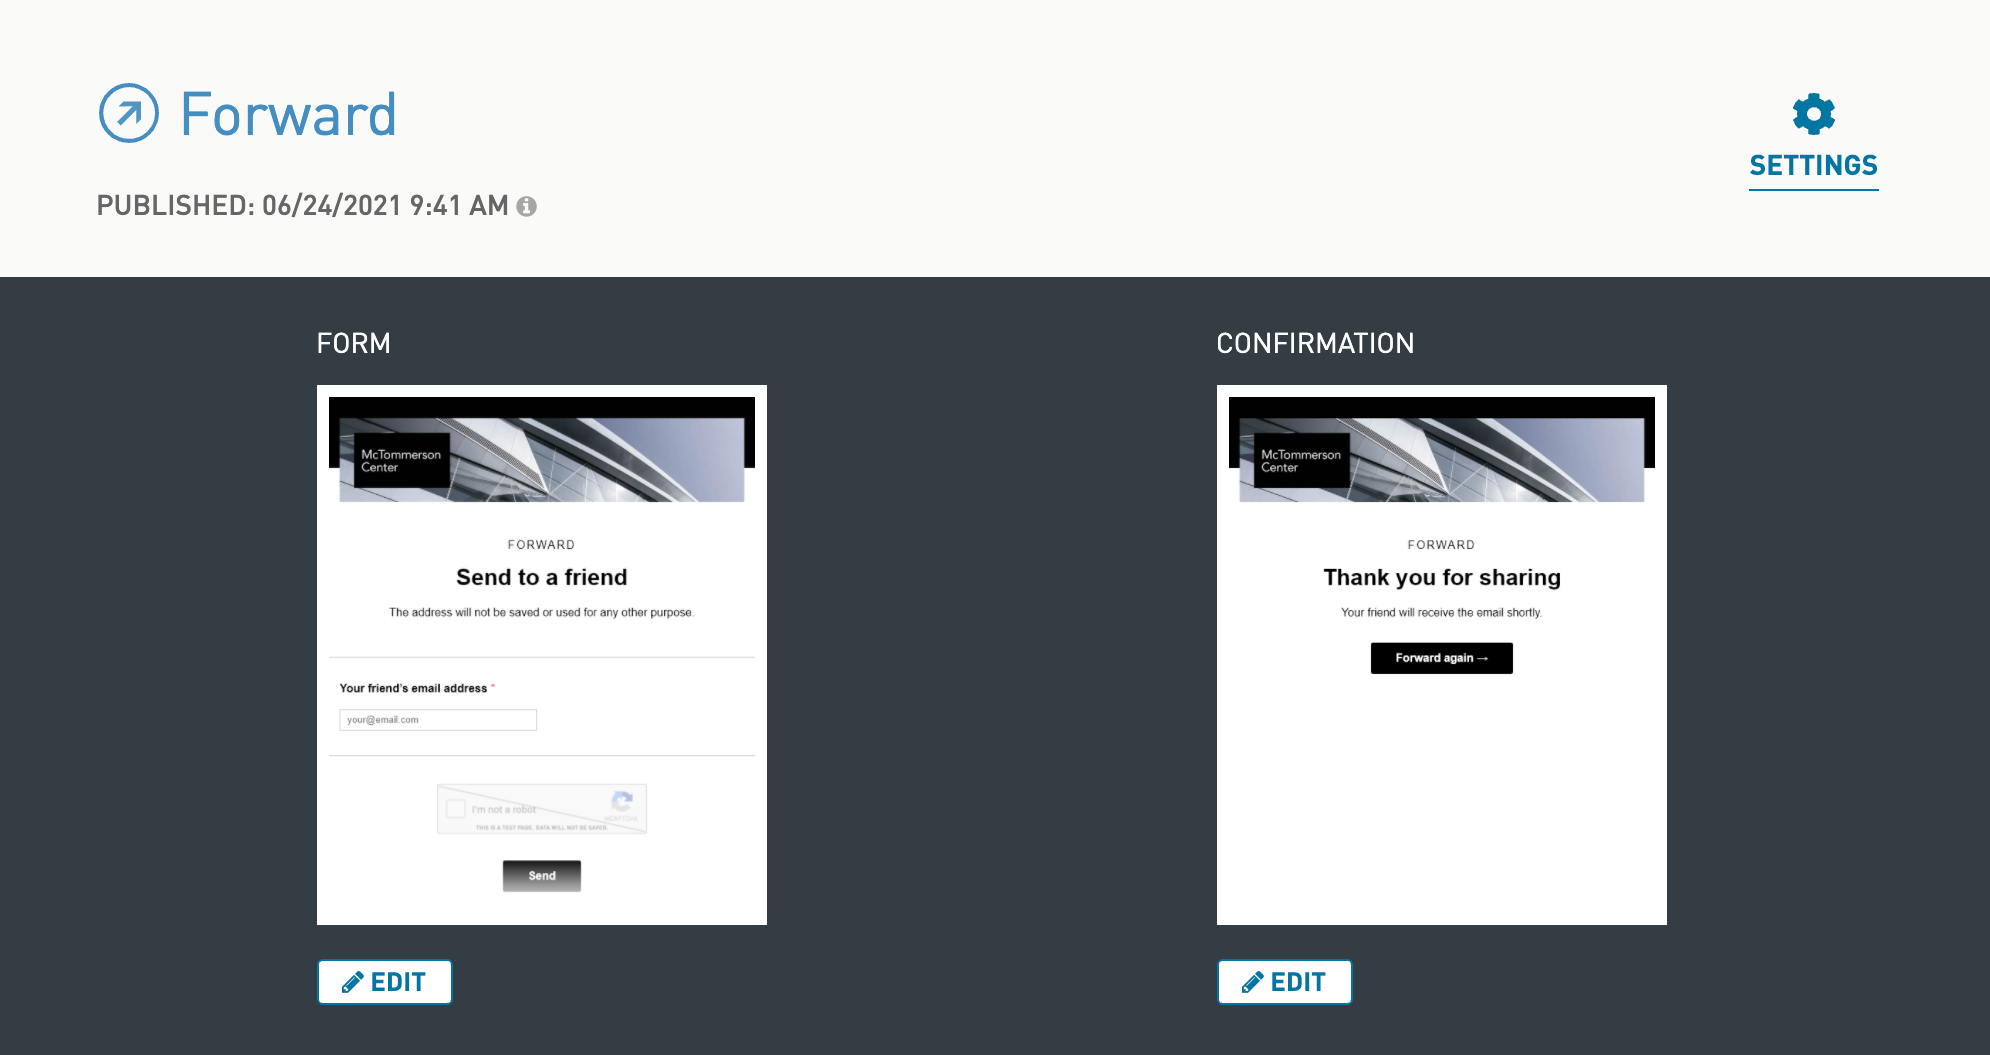
- To prevent robots from forwarding your emails, we’ve added a ReCAPTCHA field to the form
- For additional protection, we’ve limited forwarding to only one address at a time. Click “Forward again” on the confirmation page to quickly send to another address.
- It is no longer possible for a subscriber to include their own message in the forwarded email
- The forward page is not published by default
Create preferences
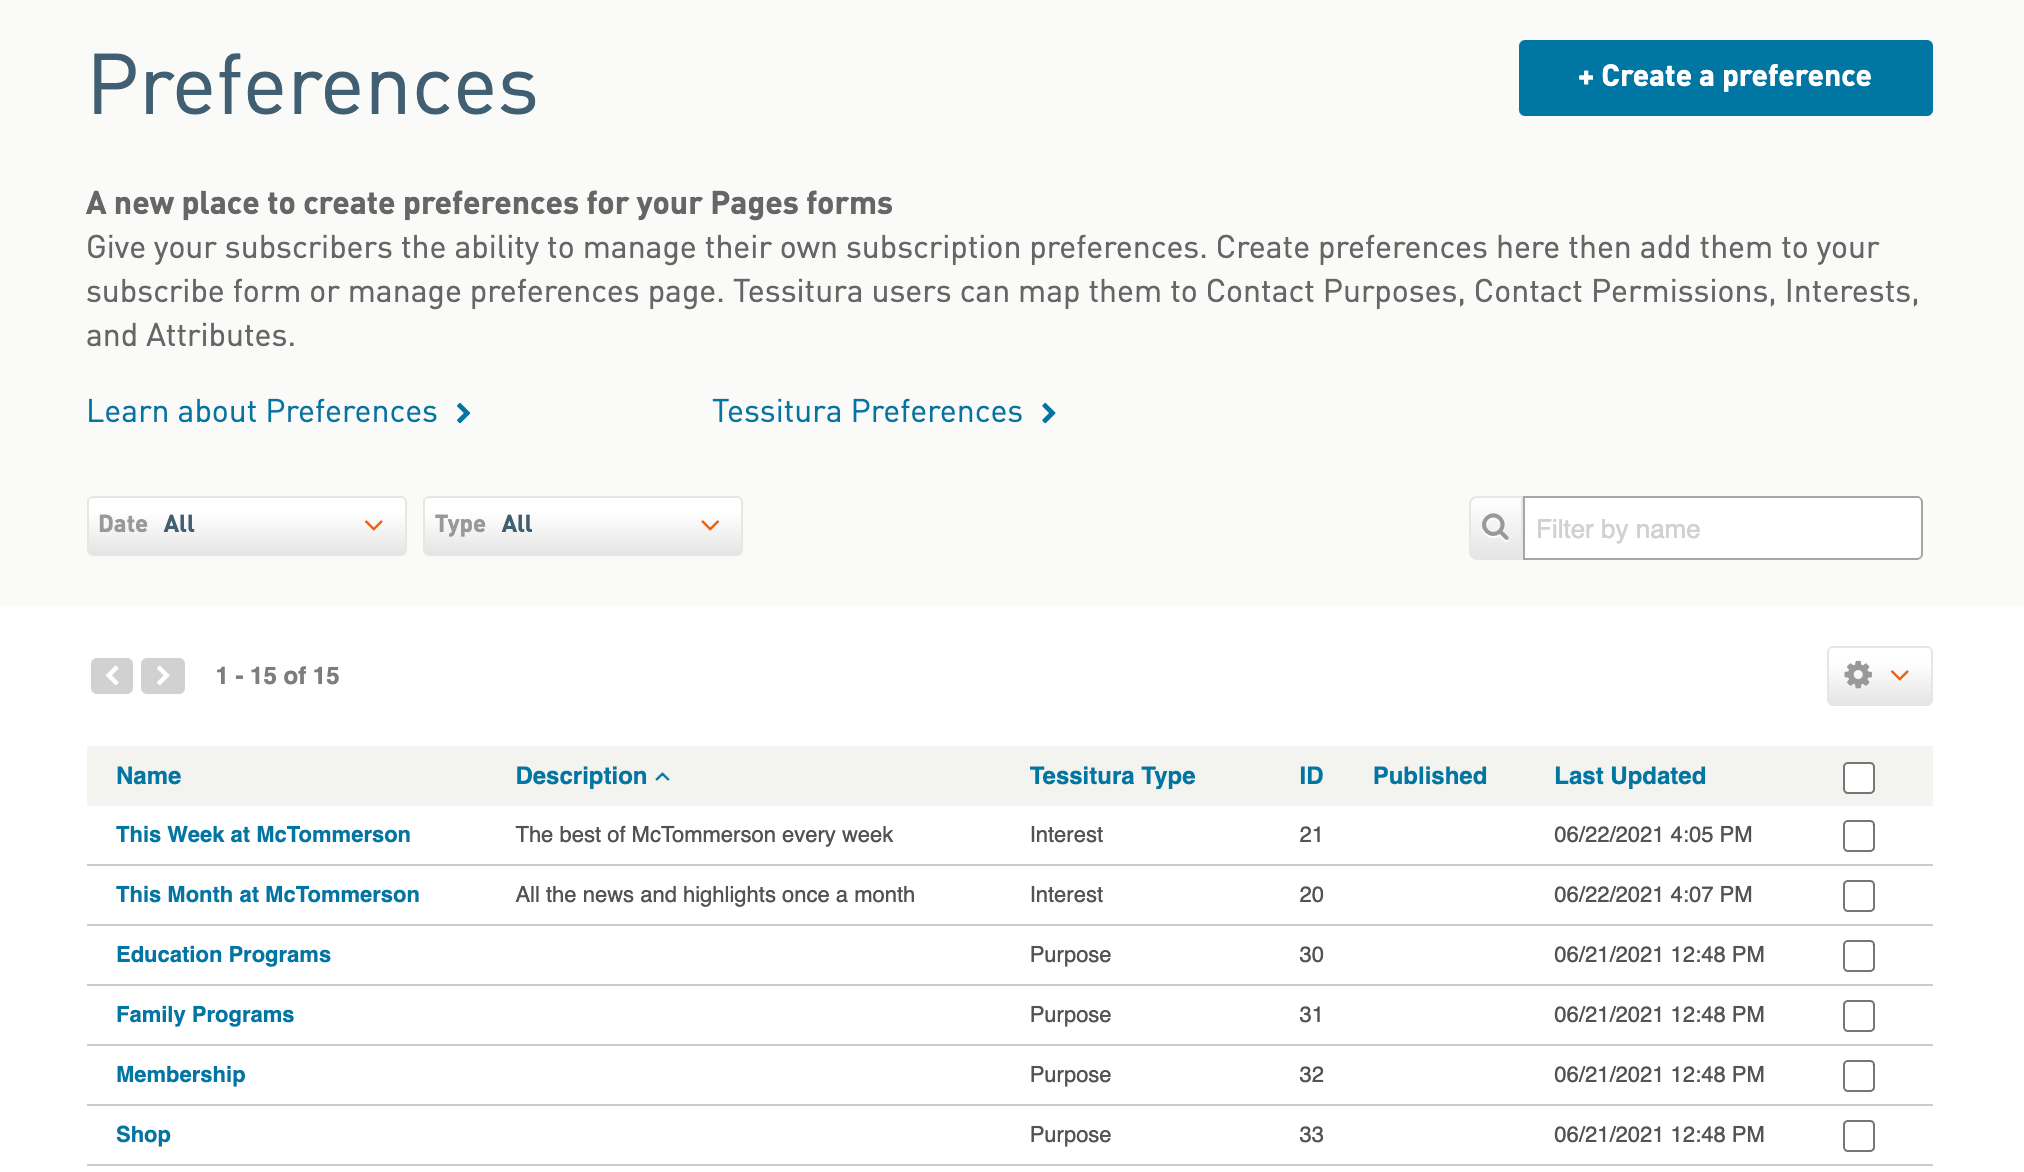
Create your preferences by going to Subscribers > Preferences. After they are created, you can add them to your subscribe and preferences pages.