The WordFly Image Editor is custom-built for email marketers. You can crop and resize images, combine multiple images in one file, add any play button style or a logo, add text on an image, and much more.
 |
Add text and use your brand fonts Why limit your design choices to Arial and Comic Sans? Use your brand font instead. In font-family, type in any font name that is installed on your computer to use it in your image. |
 |
Add play buttons Our most-requested feature. Add a play button to your video placeholder image in less than 10 seconds. |
| |
Add multiple images Add any image you need to the canvas. Pull it from your Media folder or upload it on the fly from your desktop. Add your logo to a beauty shot for the perfect banner image. Combine more images to make a collage. |
 |
Add shapes We’ve provided a library of shapes to choose from, including email and ticket icons. Apply custom colors and outlines. Combine them with text or images to create clicktastic buttons. |
 |
Add emoji Add one or many emoji from the WordFly library |
 |
Add a border Choose from six styles, then customize with any color or width. |
 |
Apply filters and adjustments Add filters like Grayscale, Vintage, and Kodachrome to your image. Adjust the sharpness, hue, contrast, and more. Combine multiple effects and control the level of the effect applied. Do it all. |
 |
Clip image Break out of the box. Use the Clip tool to create circle- and star-shaped images and more. |
 |
Crop image Select from preset proportions or draw any size you need. Click Apply and you’re done. |
 |
Draw a line Use the draw tool to quickly add straight lines or free-drawn illustrations to your image. |
 |
Resize image Type in any size. The Lock setting preserves your proportions and the Unlock setting is more flexible. |
 |
Export JPG/PNG Set the compression levels for JPG and preview the image quality before you save it to your email. If you need a transparent image that will float on any background color, save it as a PNG. We’ve got your back either way. |
Other things you can do
- Right-click on the canvas to access more options: Bring to front, bring forward, send to back, send backward, duplicate, and delete
- Use the gear icon to access settings for the image as a whole, such as rotate, set background color, and options to export image
- View dimensions when resizing or skewing an object
- Start again by clicking Start Over in the lower right corner
- After you Save and Close, your image is updated and those changes cannot be edited again
How to access the Image Editor
Image Editor is accessible when you are building your emails and pages, as well as in the Media section of WordFly.
Access from your email or page design
Whether you’re working on an email or page design, you can access the Image Editor to modify your image.
1. Open your design
2. Drag and drop an image block onto the preview panel or select an image block from the preview (right side of the editor)
3. Upload your image to the block by inserting the image src link or using the upload arrow
4. Select Edit Image
5. The Image Editor will load and you can start editing
Access from the Media section
Upload an image in the Media section of WordFly and then select Edit to start modifying the image file in Image Editor to meet your needs.
1. Go to Design Library > Media
2. Locate your file in the Media section.
3. Select the file name and then select Edit.
4. The Image Editor will load and you can start editing.
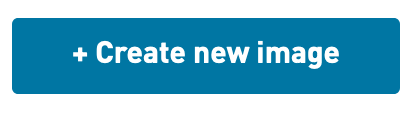
Create a new image
You can start a new image on a blank canvas from within the media library, whether you are under Design Library > Media, or accessing the Browse Media link from within a design. Click the button Create a new image to get started.
Keep in mind
- The image saves into the folder where the Create new image was selected. Images can be moved from folders after being created.
- The new image canvas will default to 1000x700
- The largest size permitted is 1200x1200
- Right-click on the canvas to access quick options, such as crop to
- Give the image a name by clicking on Untitled in the lower left corner of Image Editor. You must give the image a name before Saving.
- You can create a Save-As version of the image by opening it in Image Editor, clicking the name in the lower left corner, and typing in a new name before saving it again
Resize images
Use the resize tool when you want to retain the entire image, but only make it smaller or larger (in dimensions or downloadable file size). Your original image dimensions are maintained all the way until you click Save and Close. If you click Apply, but need to make adjustments, click the Resize icon again to start over.
To resize an image in its current proportions (without distortion)
1. Click the Resize icon in the toolbar
2. Ensure that the Lock icon is active
3. Enter the width -or- height that you would like your image to be in pixels. The other field will update automatically.
4. Click Apply
To resize an image without limitations
1. Click the Resize icon in the toolbar
2. Click the Lock icon so it switches to Unlocked status
3. Enter the width and height that you would like your image to be in pixels
4. Click Apply
Keep in mind
- The maximum dimensions that can be entered are 1200x1200px
- Images with larger dimensions generally are larger in file size and take longer for your subscribers to download. If your email contains a lot of these images, it's worth taking the time to resize them so they are only as large as they need to be.
- If you enter a width or height that is larger than the current dimensions, the image will likely become blurry. Find a larger source image if possible.
- By default, the Lock icon is active. This will preserve the proportions of the image. Click the Lock icon to Unlock it. When Unlocked, you can enter any value into the width and height fields, but it will distort your image.
- High-density pixel displays may require larger image dimensions to preserve clarity.
Crop images
Use the crop tool when you only need to retain a selected area of the canvas. Your original image is maintained all the way until you click Save and Close. If you click Apply, but need to make adjustments, click the Crop icon again to start over.
To crop an image (custom dimensions)
1. Click the Crop icon in the toolbar
2. Adjust the area for cropping.
Using your mouse, drag the handles to the dimensions that you would like your image to be. The width and height fields will automatically update. If you enter values into the fields (in pixels), the handle selection will update.
3. If needed, click inside the selected area and drag it to the desired area
4. Click Apply
To crop an image (common preset proportions)
1. Click the Crop icon in the toolbar
2. In the Presets dropdown, select the proportion you would like to use (ex: Entire Image, or Square...). The handles and width/height fields will automatically update.
3. To move the selection, click inside the selected area and drag it to the desired area
4. Click Apply
Clip images
Use the Clip tool when you want your image to appear as a non-rectangular shape in your email or page. For example, you can use it to create a circle-shaped image that floats on the background. Your original image is maintained all the way until you click Save and Close. If you click Apply, but need to make adjustments, click the Clip icon again to start over.
To clip your image
1. Click the Clip icon near the top of the toolbar
2. Click one of the clipping shapes
3. Adjust the size and position of the clipping shape as needed
4. Click Apply
5. Click the Settings icon to preview how the image will look when exported
Keep in mind
- When you click Apply, the base image will be clipped to the width and height of the clipping shape
- If you resize your image after clipping, your clipping shape will be removed. Try resizing your image first, then applying a clipping shape.
- PNGs will be exported as transparent PNGs by default. JPGs will be exported with a white background color by default. You can choose a different background color in Settings.
- When you are choosing PNG or JPG in Settings, remember that PNGs can be larger in file size than JPGs. Try saving your image as a JPG with a custom background color, if needed, for a smaller file size.
Add text to images
To add text to your image
1. Click the Text (T) icon in the toolbar
2. Select an object from the library as a starting point
3. Enter your text
4. Adjust the position and styles as needed
To change the font
1. Select the text object that you want to edit
2. Click into the Font Family field
3. Delete the name of the pre-selected font
4. Select a new font from the list -or- type in the name of any font on your computer
Keep in mind
- Font Family shows a few default fonts, but you can enter the name of any font that is installed on your computer by typing the name into the field. You can use a Google or Typekit font, but it must be installed on your computer.
- Highlight Color adds color directly behind the text. Press the spacebar if you want to add padding around the highlight.
- Background Color adds color behind the entire text box. Press the spacebar or hit Return if you want to add padding around the text.
- Font Size is shown in pixels. Values can range from 10-200.
- Line Height is shown in ems. Values can range from 0-5.
Add play buttons and other images
To add a Play button or other image from the library
1. Click the Image icon in the toolbar
2. Select the image you want to add.
3. Adjust the size and styles as needed
To add a new image from your media folder
1. Click the Image icon in the toolbar
2. Click Upload/Browse Media
3. Find your image
4. Click Select
5. Adjust the size and styles as needed
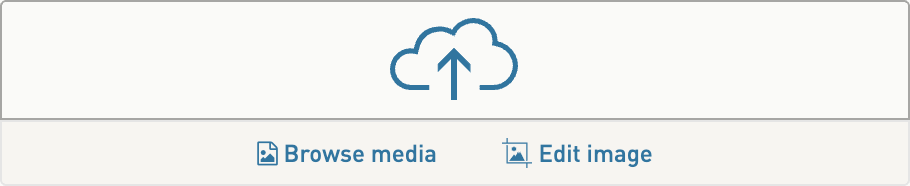
To upload a new image from your desktop
1. Click the Image icon in the toolbar
2. Click Upload/Browse Media
3. Click the cloud icon to upload a JPG, GIF, or PNG file (or drop your image on top of the icon).
4. Images with large file sizes may take longer to load inside the editor.
5. Adjust the size and styles as needed
Other image options
Find additional image editing options on the left panel when your image is selected.
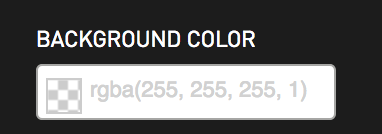
Adjust background color that displays behind the added image. Select a color from the color picker or enter an RGBA color.
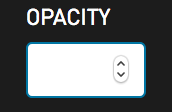
Adjust opacity of the added image. The lower the opacity the more transparent the added image will be.
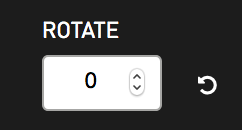
To rotate, drag the top handle or use the Rotate options on the left panel.
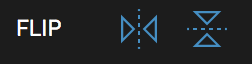
To flip the image, use the icons next to Flip
To layer an image - send to back or bring to front - use the icons next to Layer

To align an image - center, right, left, top or bottom - use the icons next to Align

Keep in mind
- To resize an object without distorting it, drag the corner handles
- To resize with distortion, drag the center handles
Add a shape to an image
Pick from one of our shape options: standard shapes (example: square, circle, triangle etc), arrow, email, basket, globe, location marker, chat bubble, volume, mic, camera, link, scissors, search, and home.
To add a shape from the library
1. Click the Shapes icon in the toolbar
2. Select the shape you want to add
3. Adjust the size and styles as needed
Other shape options
Find additional shape editing options on the left panel when your shape is selected.
Adjust fill color for the color of the shape. Select a color from the color picker or enter an RGBA color.

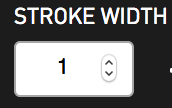
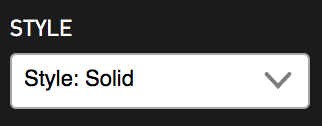
Adjust stroke color and stroke width around the shape. You can also select a stroke style.
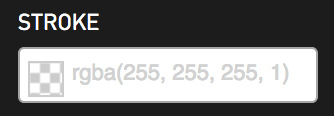
Adjust background color that displays behind the added image. Select a color from the color picker or enter an RGBA color.
Adjust opacity of the added image. The lower the opacity the more transparent the added image will be.
To rotate, drag the top handle or use the Rotate options on the left panel.
To flip the image, use the icons next to Flip
To layer an image - send to back or bring to front - use the icons next to Layer
To align an image - center, right, left, top or bottom - use the icons next to Align
Keep in mind
- To resize a shape without distorting it, drag the corner handles
- To resize with distortion, drag the center handles
Add an emoji onto an image
To add an emoji from the library
1. Click the Emoji icon in the toolbar
2. Select the character you want to add
3. Adjust the size and styles as needed
Draw a line
Use the draw tool to quickly add lines or illustrations to your image. The tool is set to free draw by default. To add a straight line, hold down the Shift key, then click to draw.
To free draw on your image
1. Adjust the color, style, and stroke width
2. Move cursor over image and click to start drawing
3. When you are done, click Stop Drawing
To draw a straight line on your image
1. Adjust the color, style, and stroke width
2. Move cursor over image and hold down the Shift key
3. Click to start drawing
4. When you are done, click Stop Drawing
Add a border
To add a border to your image
1. Click the Border icon in the toolbar. A solid black 15px-wide border will display by default.
2. Adjust the width
3. Adjust the color and style (solid, dotted, dashed etc) as needed
4. Click Apply
Keep in mind
- The border will be applied to the inside of your image
- The border can be adjusted or removed after it is applied, but it must be done before you click Save and Close
Apply adjustments and filters to images
Use Adjustments and Filters to toggle various effects to your base image. You can select more than one to combine multiple effects. When certain options are toggled on, you will see an Edit icon that lets you control the level of the effect applied.
Keep in mind
- Adjustments and filters only apply to the base image. If text or shapes are placed on top of the base image, they will retain their original styles and colors.
- B+W is literally black and white. If you are looking for subtlety, use Grayscale instead.
Export edited images
Export Settings
To save your image as a JPG (Best for photos)
1. Click the gear icon at the bottom of the toolbar
2. Make sure that JPG is selected in the Image Type toggle
3. Adjust the JPG Image Quality (shown in percentages)
4. Check the Export Preview to make sure the quality level is acceptable
5. Click X or ESC to close the layer
6. Click the Save and Close button to save the image in your media folder and exit the editor
To save your image as a PNG (Best for transparency)
1. Click the gear icon at the bottom of the toolbar
2. Make sure that PNG is selected in the Image Type toggle
3. If needed, set the PNG Background Color as transparent or a color
4. Check the Export Preview to make sure the quality level is acceptable
5. Click X or ESC to close the layer
6. Click the Save and Close button to save the image in your media folder and exit the editor
Keep in mind
- The editor exports images with the following limits: Maximum dimensions: 1200x1200px, Maximum file size: 5MB
- The higher the JPG image quality percentage, the larger your exported file size will be. This will affect load times of your emails. Be kind to your subscribers: Use the smallest image quality you can without degrading your image too much.
- If your JPG image has text in it, you may need to use a higher percentage to preserve legibility.
- If you save photos as PNGs, they will generally be fairly large in file size. PNGs are best when you want text or logotype to be transparent so they float on a variety of background colors.