Introduction to conditions
Conditions give you a powerful way to send customized content to each subscriber. Instead of creating a new email design with different content for each subscriber on your list, you can now create one dynamic email.
WordFly will automatically display the right content for the right subscriber. Conditions can save you time and help you provide more relevant content to your subscribers which results in higher engagement and conversion rates.
How conditions work
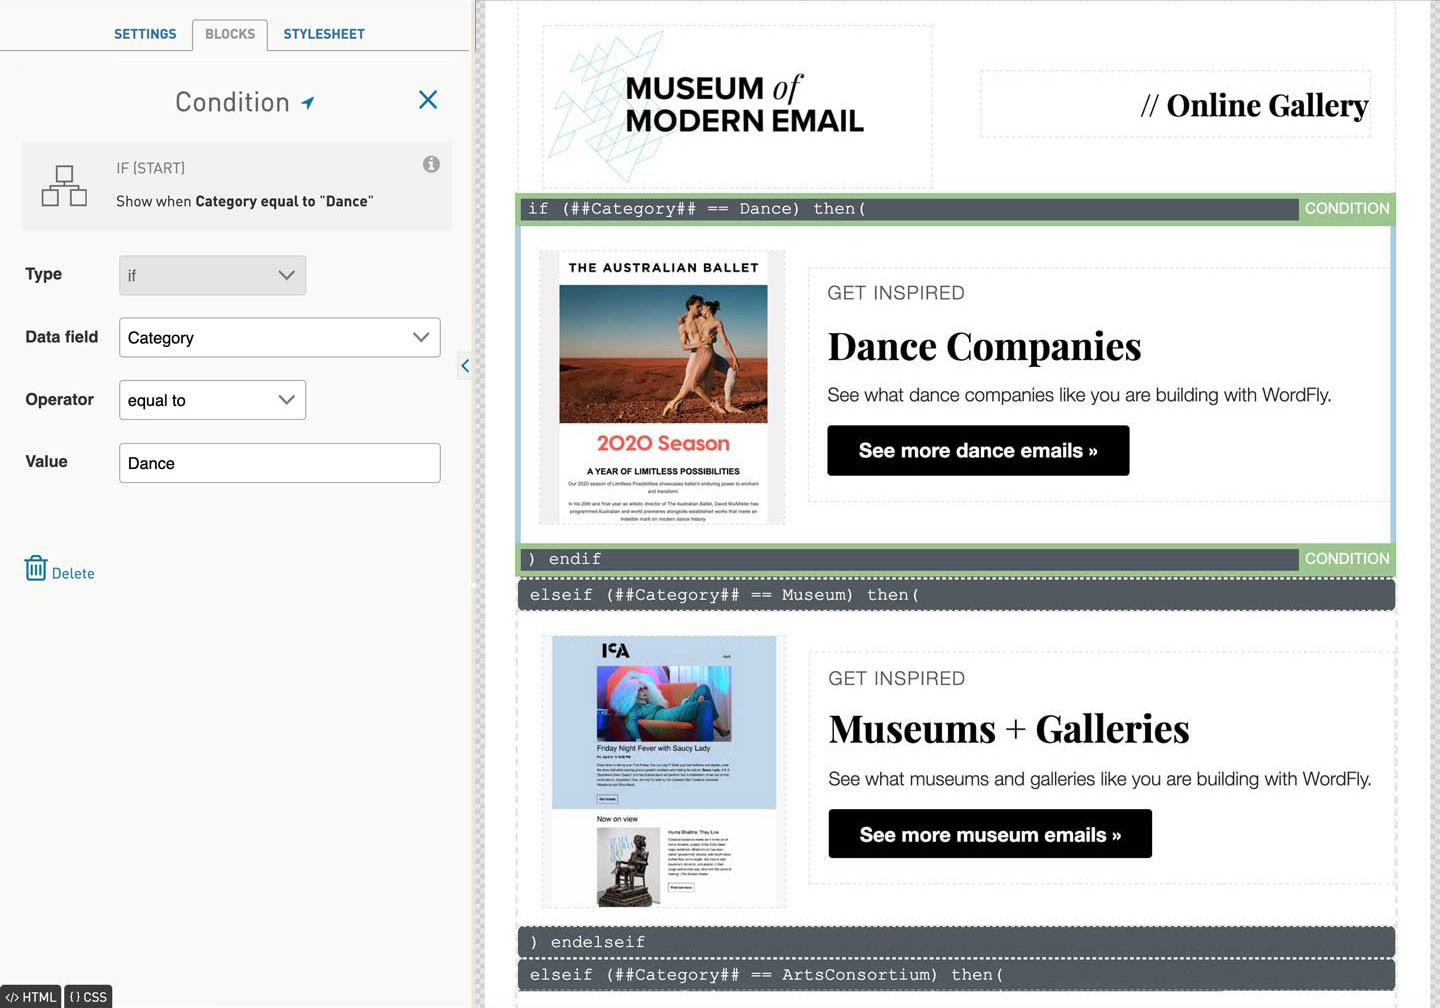
The most basic technique is to choose a content block (text, image, video, etc.) and wrap a conditional statement around it. This is a simple “yes or no” situation. If the subscriber meets the condition, they’ll see the content. If they don’t, they won’t. Here’s how we used the Conditions tool to stipulate that it should only show this content to subscribers who are listed in our database as NOT confirmed for a hotel reservation.


if/then statements
You can also use if/then statements to create a chain of conditions. WordFly conditions follow traditional if/then statements that use data fields and operators.
| Tag component | Definition | Example |
| IF | This is the minimum condition. If conditions can be used alone or at the top of a chain. When a new condition is dropped into an email, it defaults to an if statement. | {{if(##DataField## == A) then (A statement) endif}} |
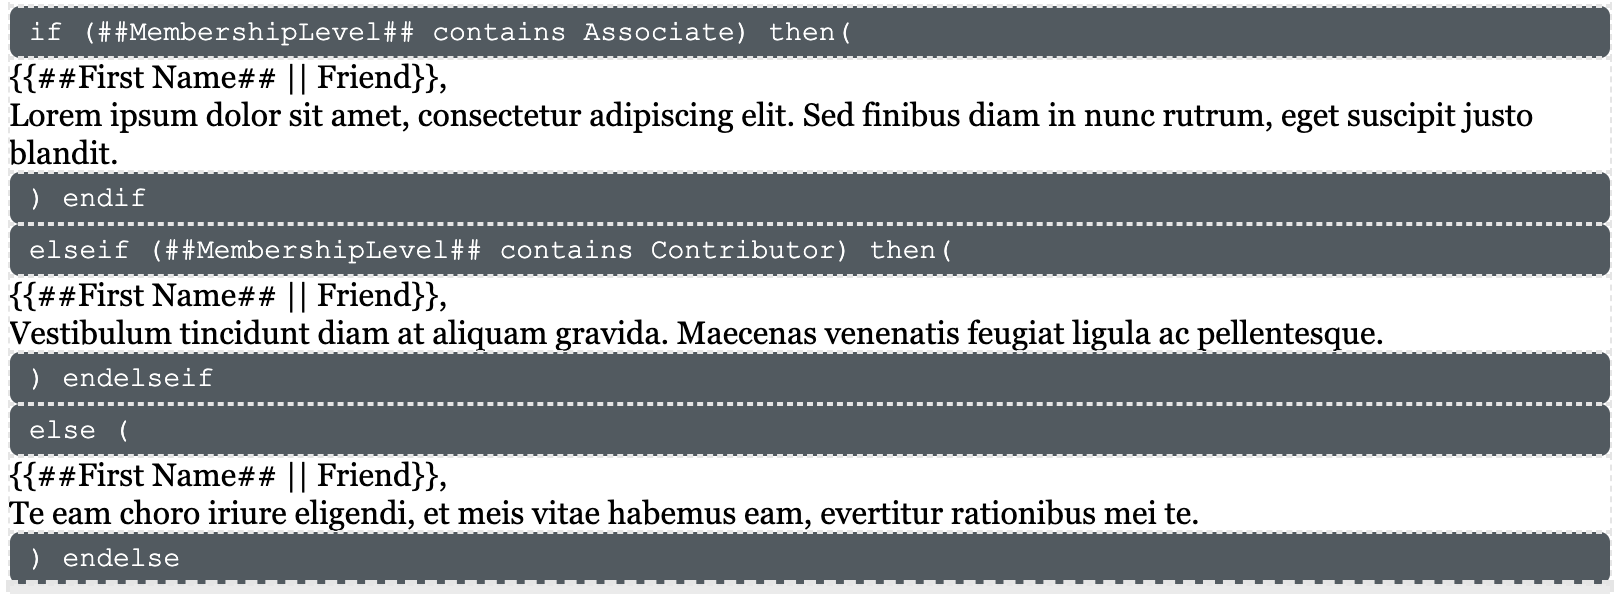
| ELSE IF | Optional. You can chain together as many as needed. Else If conditions can only appear in the middle or end of chain. | {{if(##DataField## == A) then (A statement) endif elseif(##DataField## == B) then (B statement) endelseif else(Statement if no conditions are met) endelse}} |
| ELSE | Optional. Use this as a fallback when needed. Else conditions can only appear at the end of chain | {{if(##DataField## == A) then (A statement) endif elseif(##DataField## == B) then (B statement) endelseif else(Statement if no conditions are met) endelse}} |
| END | Added automatically. End will end a minimum condition/statement (endif) to allow another (endelseif) to begin; or it will end (endelse) the conditional tag. | {{if(##DataField## == A) then (A statement) endif elseif(##DataField## == B) then (B statement) endelseif else(Statement if no conditions are met) endelse}} |
Operators
Conditions use operators to set data relations and key off statements. The operator tells WordFly what connection to make with the data field in the if part of the conditional statement.
Example: {{if(##DataField## == A) then (A statement) endif}}
In this example, WordFly is looking for DataField to be equal to A in order for the minimum condition to be met to display the A statement. Any subscribers that have data equal to this DataField will see the A statement.
Note: Only certain operators are available depending on the data field selected. For example, with a preference data field, only equal or does not equal operators are available.
Available operators:
- == equal to
- != does not equal
- contains
- does not contain
- > greater than
- >= greater than or equal to
- < less than
- <= less than or equal to
What to expect
- After dropping the condition, set the type, data field, operator, and value parameters of the condition on the edit content panel (left side). If you don't find the data field you need, you can create a new one.
- Once dropped, conditions can’t be dragged. If you drop it in the wrong spot, delete it and drag over a new one.
- Conditions cannot be nested inside each other.
- While nesting conditions is not possible, WordFly does support including a simple dynamic tag (Example: {{##First Name## || Friend}}) in a block that has a condition wrapping it.
- Deleting a condition will not delete the content inside of it.
- Testing is extremely important. Under the Testing tab of your email campaign, test how the condition is working with Subscriber Preview or by updating the Default Test List. Learn more
- Are you a current Dynamic Tags hand-coder? Use caution if you already have existing hand-coded dynamic tags inside a block and want to use our Conditions feature to add more. If you manually add new dynamic tag code in a block, you might break things. Be careful and remember to test.
Create a condition
Conditions live in the blocks tab. Use the blocks toggle to select conditions. Then pull the conditions block over to the preview panel.
To create a chain of conditions, the conditions need to be touching and directly adjacent to each other. Start by creating individual blocks in your email for the content you need to show to different audiences. Then drop a Condition around each block and set the data field and requirements need to display it. When your email is sent, it will display the content to the subscribers who meet those requirements.
1. Add all your content blocks that need to be conditional to the email design
Building your content first helps lay the foundation for conditions. Add image blocks, text blocks, or whatever you need to display for various subscribers.
2. Toggle to conditions from the left panel

3. Drag and drop the conditions block over to the right panel

4. The condition will wrap around your content block
The condition block cannot be moved at this point. Other blocks can be moved around.

5. Adjust the condition on the left panel
The condition settings include Type, Data Field, Operator and Value.
- Types are if, elseif, or else. The first and minimum condition starts with if. The last condition in a chain must start with else.
- Data fields are created under Subscribers > Data Fields and define fields for merging list and subscriber data.
- Operators help set data relations.
- Values define data fields. Your data values must match your list or subscriber data exactly.

6. To build on the condition, drag and drop another condition directly below the first one to continue the chain with elseif
Continue adding Type elseif condition blocks as needed to extend it as many times as needed.

7. To end the condition, drag and drop another condition below the last elseif to define the final else condition
The condition must end with a Type else condition block.

8. The final tag with two conditions and an else chained together looks like this in the design

9. Be sure to test
Testing is extremely important with conditions. You'll want to make sure your data and conditions are set up correctly so the right people will see the right thing. Use Subscriber Preview to see what your subscribers will see. If your data field is a List Data Field and you send a test email, you will need to add the list data for the recipients in the Default Test List. Learn more
Example of a chain of conditions
Let’s say you have three messages you want to display in your email based on their audience type:
- VIP
- Member
- All of your other subscribers
For this example, let’s also say you store those VIP and Member values in a data field called Audience. To get started, you would create a content block for each audience in your email. Then drop a Condition around each area. For each condition you would select the type (IF, ELSE IF, or ELSE), the data field (Audience), and the requirements needed to display that block (data equals VIP or Member). In plain language the conditions would be saying:
- IF the Audience data field is equal to VIP, show this content.
- (Or) ELSE IF the Audience data field is equal to Member, show this content.
- (Otherwise) ELSE, show this content to everyone else.

Troubleshooting
My conditional blocks aren’t working.
- Check for data field Values. Is the value correct? Does it match in punctuation and capitalization?
- Check condition Types. Conditions always start with if and end with else.